JnK Plugins
How to Build a WordPress Form with Trinity Forms (Step-by-Step)
If you have ever wanted a contact form on your WordPress site without wrestling with a clunky third-party builder, this Trinity Forms tutorial is for you. We will walk through exactly how to build a WordPress form from scratch — from installing the plugin to collecting and exporting real submissions. No shortcodes to memorize, no separate drag-and-drop canvas to learn.
This guide is aimed at beginners and busy site owners: small businesses collecting leads, bloggers adding a contact page, agencies building client sites, and anyone who wants a genuinely free form builder that plays nicely with the WordPress they already know.
Why block-native forms are nice
Most form plugins bolt on their own editor — a separate interface with its own quirks that you have to learn on top of WordPress itself. Trinity Forms takes a different approach: the form editor IS the Gutenberg block editor. You build a form the same way you build any page or post, by adding blocks. Each form field — name, email, message, select, radio, checkbox, and more — is just a block you drop in and configure in the sidebar.
That means there is nothing new to learn. If you can write a WordPress post, you can build a form. Everything lives inside WordPress too: entries are stored natively in your database, so there are no per-entry fees and no data held hostage on someone else’s servers. Let’s build one.
Step 1 — Install Trinity Forms
First, get the plugin onto your site:
- In your WordPress dashboard, go to Plugins → Add New.
- Search for Trinity Forms in the keyword box.
- Click Install Now, then Activate.
Once activated, look for a new Forms item in your admin menu — that is where Trinity Forms lives. Everything you do from here on starts from that menu.
Step 2 — Create a new form and add fields
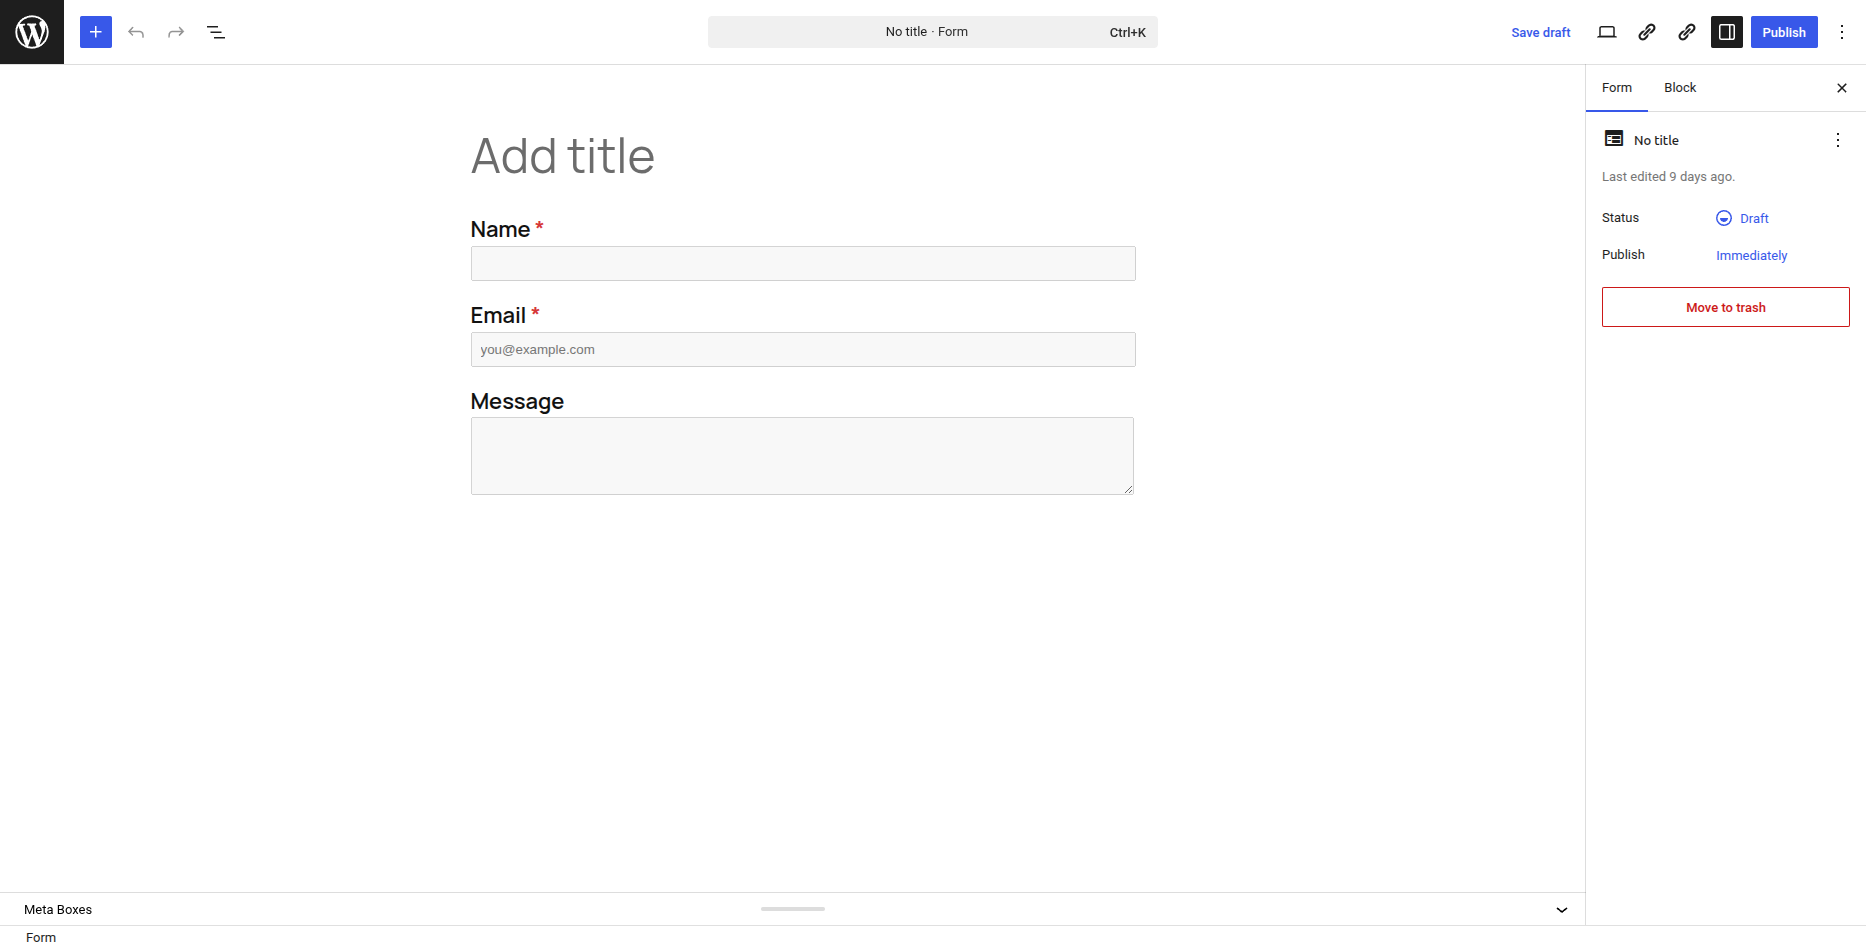
Now for the fun part. From the Forms menu, create a new form. You will land in a familiar editor — because it is the Gutenberg block editor. Building your form is just a matter of adding field blocks.
Let’s build a simple contact form with four fields:
- Click the + (block inserter) and add a Name field block.
- Add an Email field block below it.
- Add a Select or Radio field so visitors can choose a topic — for example “Sales”, “Support”, or “General question”.
- Add a Message field for the body of their inquiry.
To configure any field, click it and open the block sidebar on the right. There you can set the field label, placeholder text, and — importantly — toggle whether the field is required. Mark Name, Email, and Message as required so visitors can’t submit an empty form. You can drag blocks up and down to reorder them exactly like any other blocks, so arranging your form is effortless.
Beyond these basics, Trinity Forms includes a full set of field blocks in the free version: number, date, rating, checkbox, consent, section headings, page breaks, custom HTML, and hidden fields. You can build anything from a one-line signup to a detailed intake form.
Step 3 — Set up conditional logic
Conditional logic lets your form react to what visitors choose — and it is included free. Say you added a Select field asking “What can we help with?” and you only want a “Company name” field to appear when someone picks “Sales”.
Select the field you want to control (the Company name field), open its block sidebar, and enable conditional logic. Set a rule like: show this field when “What can we help with?” is equal to “Sales”. Now the field stays hidden until it is relevant, keeping your form short and friendly for everyone else.
Tip: Conditional logic is great for keeping forms concise. Only ask for what you need, when you need it — shorter forms almost always convert better.
Step 4 — Configure email notifications and spam protection
A form is only useful if you actually find out when someone submits it. Open your form’s notification settings and point the notification to the right admin email address — the inbox you actually check. You can customize the subject line and the message body so incoming submissions are easy to scan.
While you are in settings, turn on spam protection. Trinity Forms includes built-in spam filtering, and you can enable Cloudflare Turnstile for a privacy-friendly, no-friction alternative to traditional CAPTCHAs. This keeps bots out without making real visitors squint at blurry images.
Step 5 — Publish the form and embed it on a page
With your form built, it is time to put it in front of visitors:
- Save or publish your form.
- Edit the page or post where you want the form to appear — for example your Contact page.
- Add the Trinity Forms form block and select the form you just built.
- Update the page.
That’s it — the form is live. Because it is a native block, you can drop it anywhere blocks are supported: pages, posts, and most block-enabled areas of your theme.
Step 6 — View and export entries
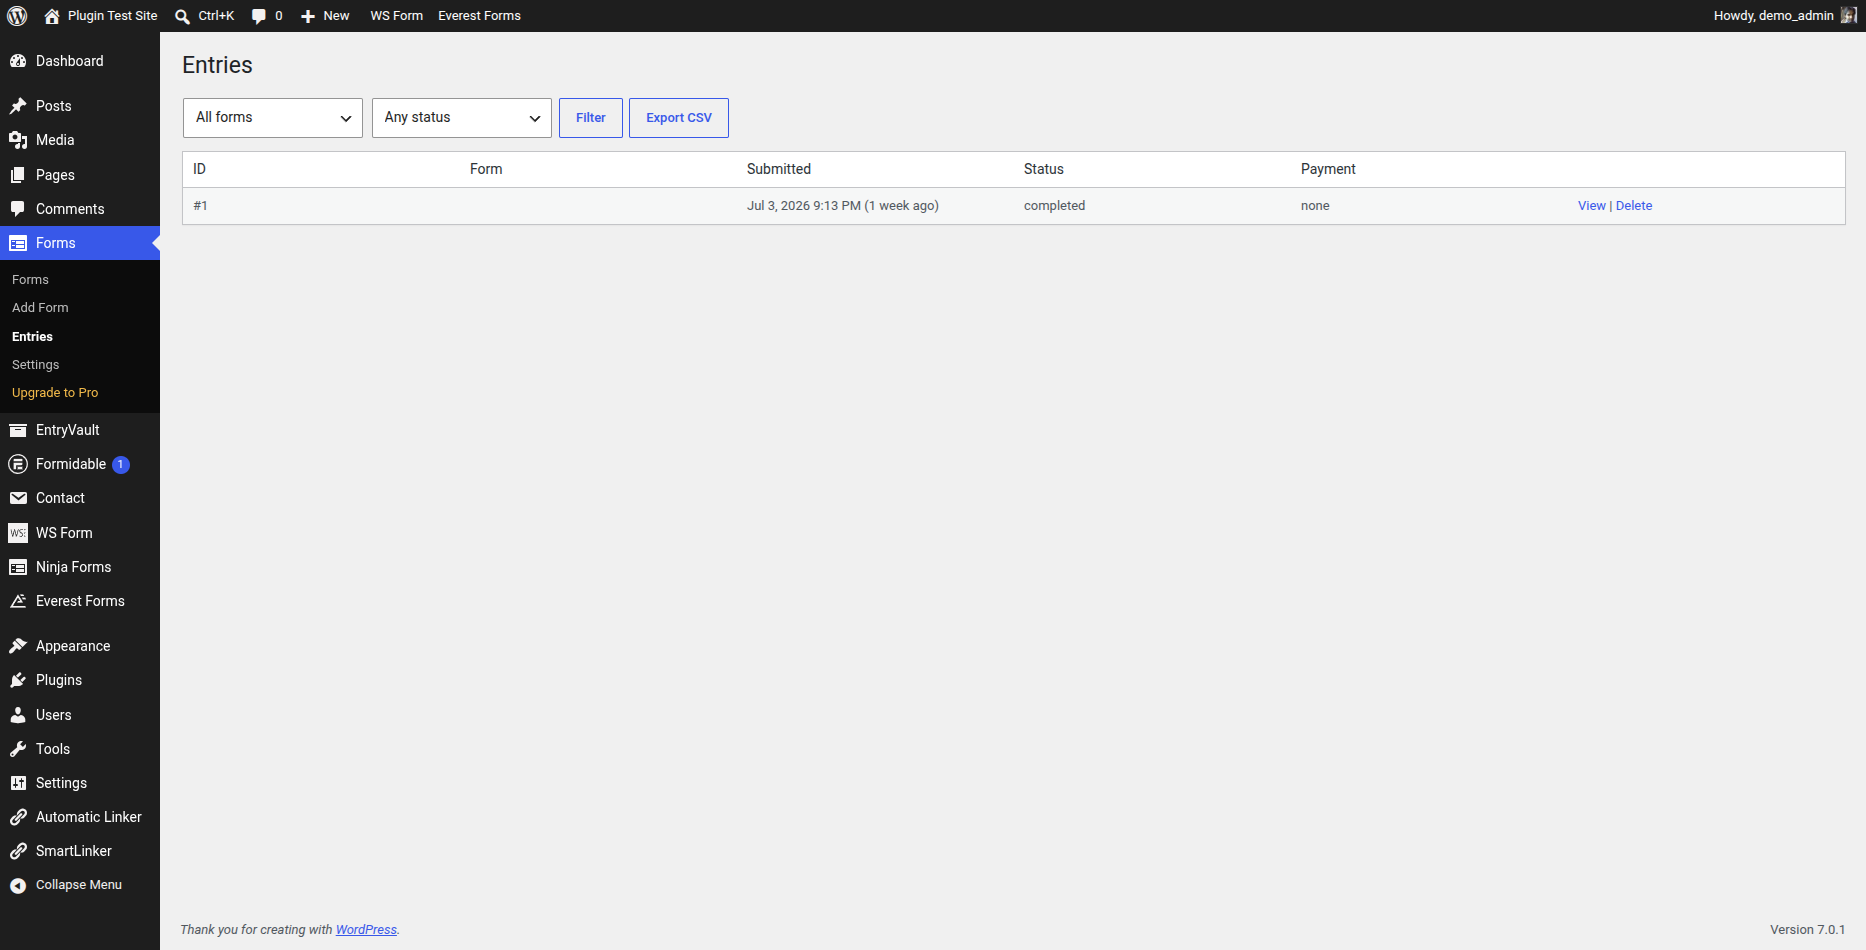
Every submission is stored natively inside WordPress, so your data is always yours. To see what’s coming in, open the Entries screen from the Forms menu. There you can browse individual submissions, read message details, and review who filled out which field.
Need the data elsewhere — a spreadsheet, your CRM, an accountant? Use the built-in CSV export to download all entries in one click. No monthly caps, no per-entry charges, no lock-in.
Step 7 (optional) — Add payments or multi-step forms with Pro
Everything above is free. If you need more, Trinity Forms Pro (from $49/yr, with lifetime options available) adds a payment field so you can collect money via Stripe or PayPal right inside your form — perfect for order forms, deposits, or donations. Pro also unlocks multi-step forms that break long forms across pages, plus integrations and advanced field types. And if a license ever lapses, Pro keeps working for 30 days while you sort it out. After that your forms, payments included, keep working for visitors, so nothing breaks unexpectedly.
Wrapping up
That’s the whole journey — from an empty site to a working, spam-protected WordPress form with stored, exportable entries. Because Trinity Forms is block-native, you built all of it using the WordPress editor you already know, with no separate builder to learn and no per-entry fees to worry about.
Ready to get started? Grab Trinity Forms and build your first form today. If you are migrating from another plugin, our guide on the best Contact Form 7 alternative is worth a read, and if you want to master collecting and exporting submissions from any builder, see how to store and export WordPress form entries.
Frequently asked questions
How do I create a WordPress form without code?
Install Trinity Forms, create a new form (the editor is the WordPress block editor), add field blocks like Name, Email and Message, mark the required ones, then embed the form on any page with the Trinity Forms block. No shortcodes or separate builder to learn.
Are Trinity Forms entries stored in WordPress?
Yes — every submission is stored natively in your WordPress database, with no per-entry fees and no data held on someone else’s servers. You can browse them on the Entries screen and export everything to CSV in one click.
Is Trinity Forms free?
The core is free forever, including entry storage, conditional logic, spam protection and surveys/quizzes. Pro (from $49/yr, with lifetime options) adds payments, multi-step forms with save-and-resume, and advanced fields.
Related reading
- Gravity Forms vs Contact Form 7 — where Trinity Forms sits between the two
- Tracking form conversions in GA4 — measure the form you just built
- Accepting file uploads in WordPress forms — adding upload fields safely